Complete Guide for Thermal Printers' Setup
A comprehensive guide on how to setup thermal printers for printing FBA labels through Label Resizer, including instructions for both Dymo and Zebra thermal printers. Step-by-step instructions for both Windows and Mac users on how to adjust printer settings, set custom label sizes, set darkness, speed and unprintable area, and more.

Printing FBA labels through thermal printers requires proper printer setup to get readable barcodes. This guide will eliminate this need and detail steps of printing labels through Label Resizer with your Dymo or Zebra thermal printer.
Label Resizer customizes and generates your labels in line with your preferences in seconds directly from your Seller Central Account. To do this, you can use either browser extensions or the web page upload methodology of Label Resizer. (Try out Free Trial — 14 Days Free Trial with No Need for a Credit Card.)
Following two sections list the printer setup steps for a Dymo LabelWriter and a Zebra thermal printer. No need for ink or toner for thermal printers, since they use heat to print labels. You just need to buy thermal roll papers suitable for your printer.
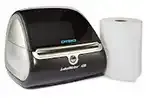
Dymo Thermal Printer Size Setup
To adjust printer setup you can follow the following steps for your operating system:
For Windows Users
- Go to Control Panel then Devices and Printers
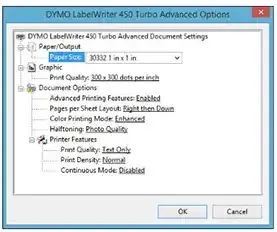
- Right-click on your printer and choose Printer Preferences
- Click the Advanced button
- Under Paper Size, select the proper label size for your labels
- Go back to the Control Panel then Devices and Printers
- Right-click on your printer, select Printer Properties
- Click the Advanced tab then Printing Defaults then Advanced
- Change the Paper Size to the same as you chose before
For Mac Users
- To manage your printer settings, go to your browser and type
http://localhost:631/printers(CUPS interface for Mac Users) - In case you get an error, open Terminal and paste the command
cupsctl WebInterface=yes. This is to enable “Web Interface” - Then go to the first step again
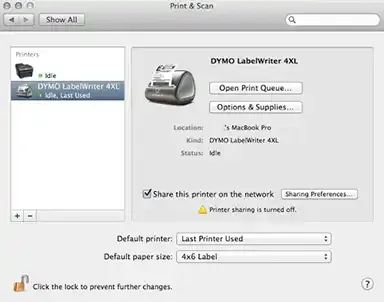
- Choose your printer from the list of printers
- Choose “Set Default Options”
- Choose the default paper size. Select your label size in the list
- You can also choose the “Custom” option to enter your own label size
- Click Set Default Options
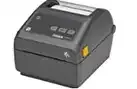
Zebra Thermal Printer Size Setup
To adjust printer setup you can follow the following steps for your operating system:
For Windows Users
- Go to Control Panel then Devices and Printers
- Right-click on your printer and choose Printer Preferences
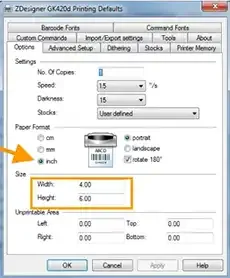
- Click the Stocks Tab at the top
- Check if your label size is listed; if not, click New on the bottom
- Enter the name of your label such as “4x6 FBA Label”
- Set the Darkness to 15 and the Speed to 1.5
- Enter the dimensions of the label. Enter 4 in the width section and 6 in the length section for a 4x6 shipping label
- Set the unprintable area as zero
- Click the OK button
For Mac Users
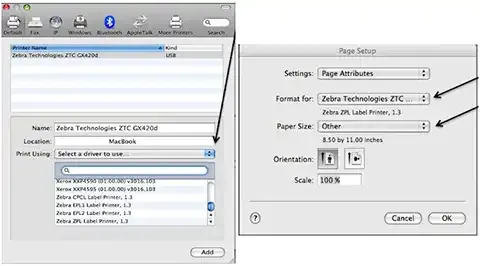
- Go to System Preferences then Print & Fax
- Click on (+) to add printer
- Available printers will appear. Select Zebra printer
- Now select the dropdown to select a driver. You will have 4 Zebra Options to choose from. Select Zebra ZPL unless printer specifies differently
- Open up Word then select File and Page Setup
- In Page Setup, change Format for to the Zebra Printer and select the Dropdown for Paper Size. You may also want to select your orientation for your layout
- Select Manage Custom Sizes
- Click on the (+) to add a name to the custom Size
- Set Printer Margins and make them all zeros
- Then click OK
Setting Up Label Size on Label Resizer Dashboard
Now you can go to your Label Resizer account to set your label size for your thermal printer.
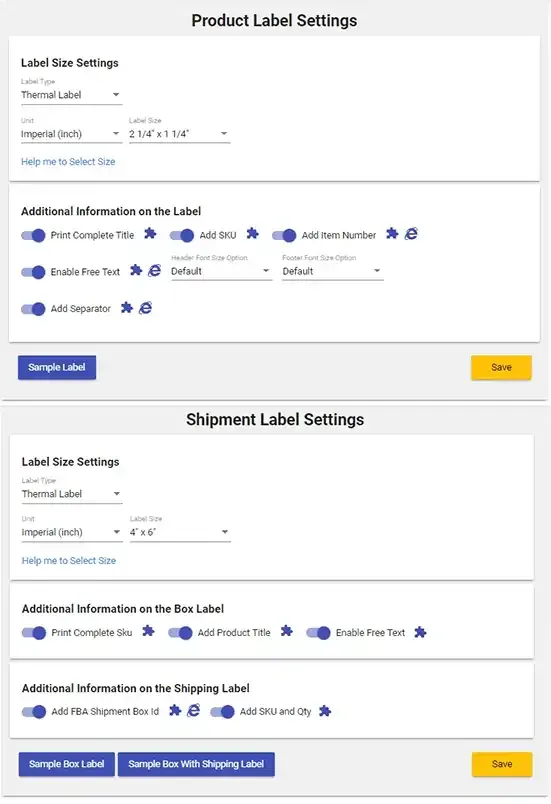
- Go to your Label Resizer Dashboard
- Open up the Settings Page
- Select the label size for both “Product Barcode” and “Shipment Label”. You need to select the exact same size as your thermal printer’s label size. If the label size you want to specify does not show up in the list, select the “Other” option in the “Label Size” and specify the label width and height from the “Custom Width” and “Custom Height” lists.
- You can also select label size based on Dymo Thermal Printer Labels SKU number. Just click the “Help me to Select Size” link in the settings area. In the popup window, select the DYMO SKU number then click select as shown below.
- Click the “Save” button to apply your new settings
Now you are ready to print your FBA labels in seconds with the unique features of Label Resizer.